How To - Statically Address a Gateway 3 (DLGW3)
 Updated
by
Steve Corbesero
Updated
by
Steve Corbesero
This guide only applies to gateways of model DLGW3-LR or DLGW3. These products will have serial numbers beginning in 0202XXXX.
Necessary items
- Commissioner 3.4.1 or newer
- Micro USB cable
- “Live” Ethernet Connection (can be POE switch or other network)
- DLGW3-LR or DLGW3
Before you start
Skip to the bottom of this guide if you need to revert a DLGW3 from Static IP to DHCP
Enable static gateway addressing to expose the necessary menu options from the Map menu. To enable on Windows:
- Click the Edit menu, then select Preferences
- In the Preferences Dialog, select Enable advanced Gateway addressing.
- Click OK.
To enable on Mac:
- Click the Commissioner menu, then select Preferences.
- In the Preferences Dialog, select Enable advanced Gateway addressing.
- Click OK.
Workflow
- Add all DLGW3’s to mapfile via serial number.
- Connect a micro USB cable to the USB port of the computer running Commissioner. Connect the micro USB cable to the micro USB port of the DLGW3.
- Connect the PoE port of the DLGW3 to a PoE switch or other "live" ethernet connection.
- In Commissioner, click the Map menu and select Set Gateway 3 IP Addresses....
- Once the Gateway 3 Addressing dialog is opened, the tool will auto-discover the connected DLGW.
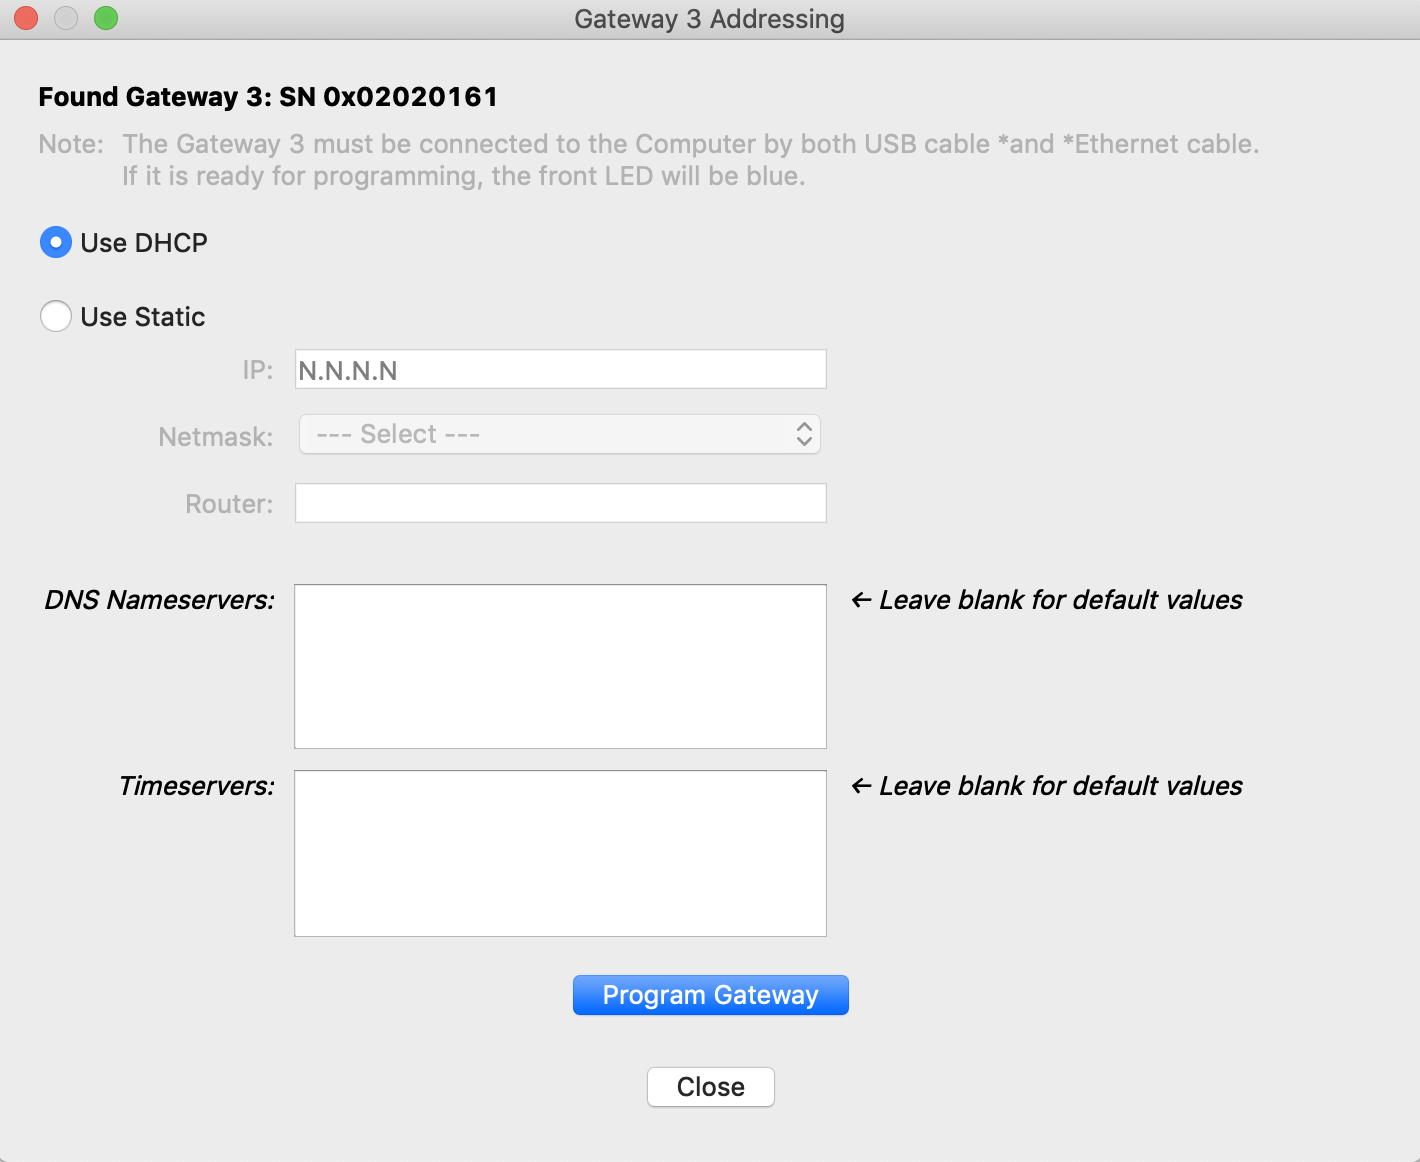
- Select the option to Use Static.
- Populate the IP, Netmask, and Router fields with the correct information that was assigned by the IT representative.
If using custom DNS Nameservers or NTP Timeservers, add them to the respective field. Use a comma (no spaces) to separate multiple addresses, leave blank to use default addresses.
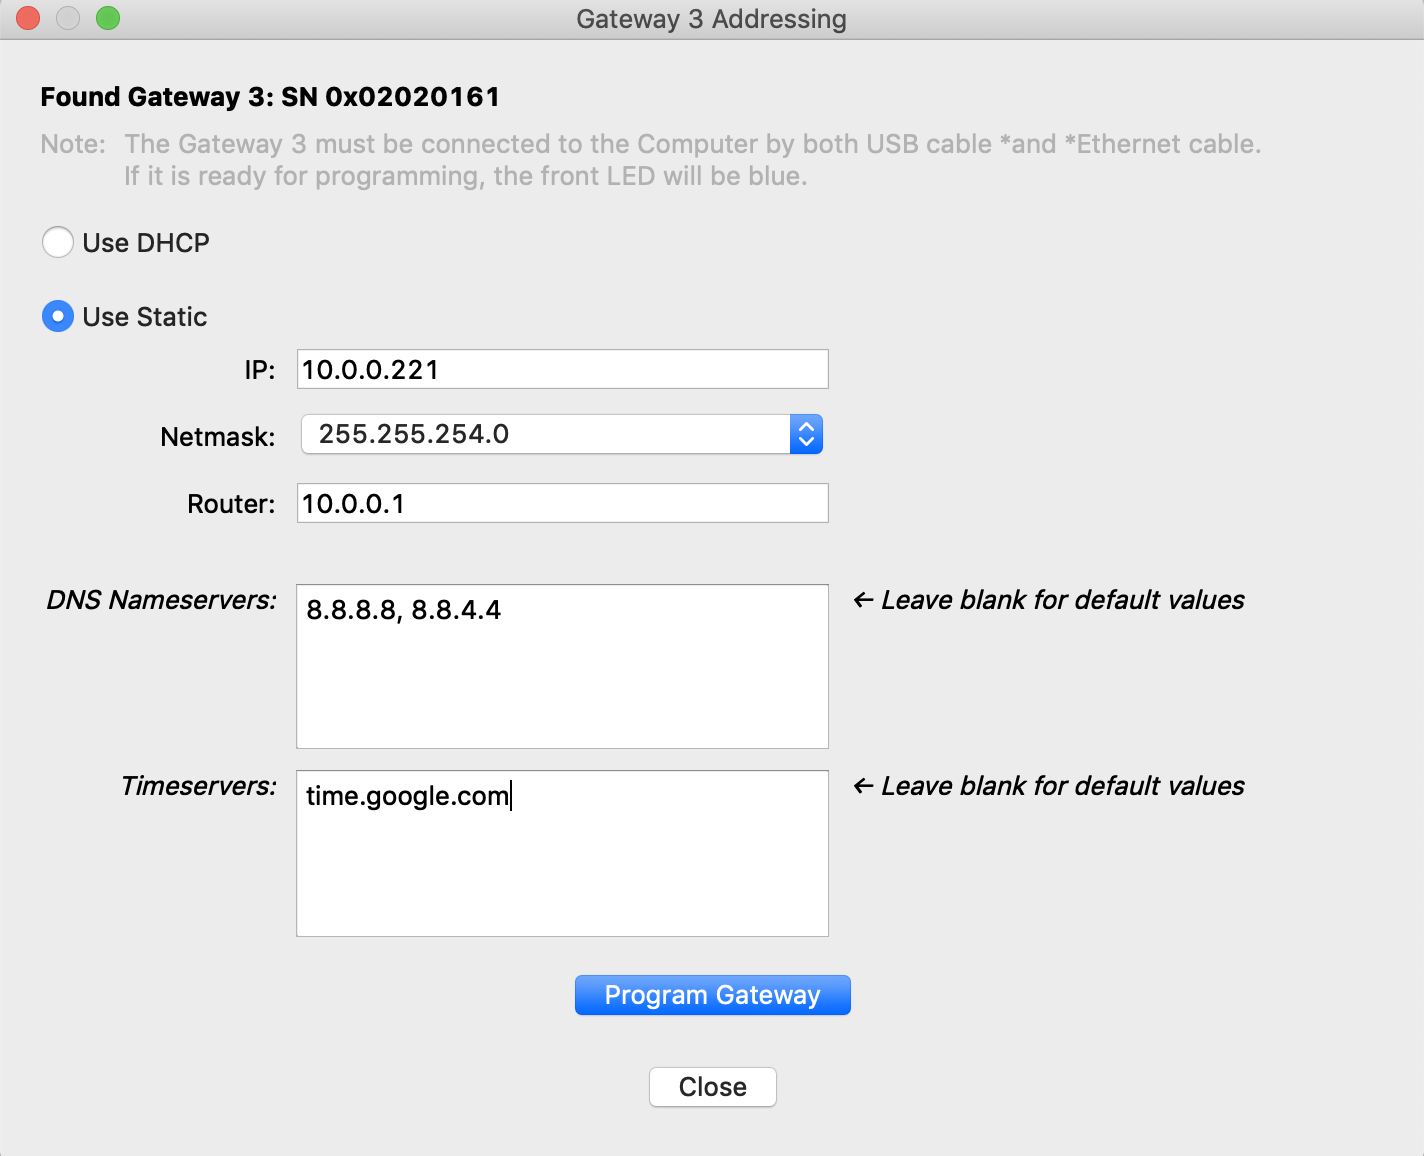
- Click Program Gateway. If programming was successful, the below message will be displayed.
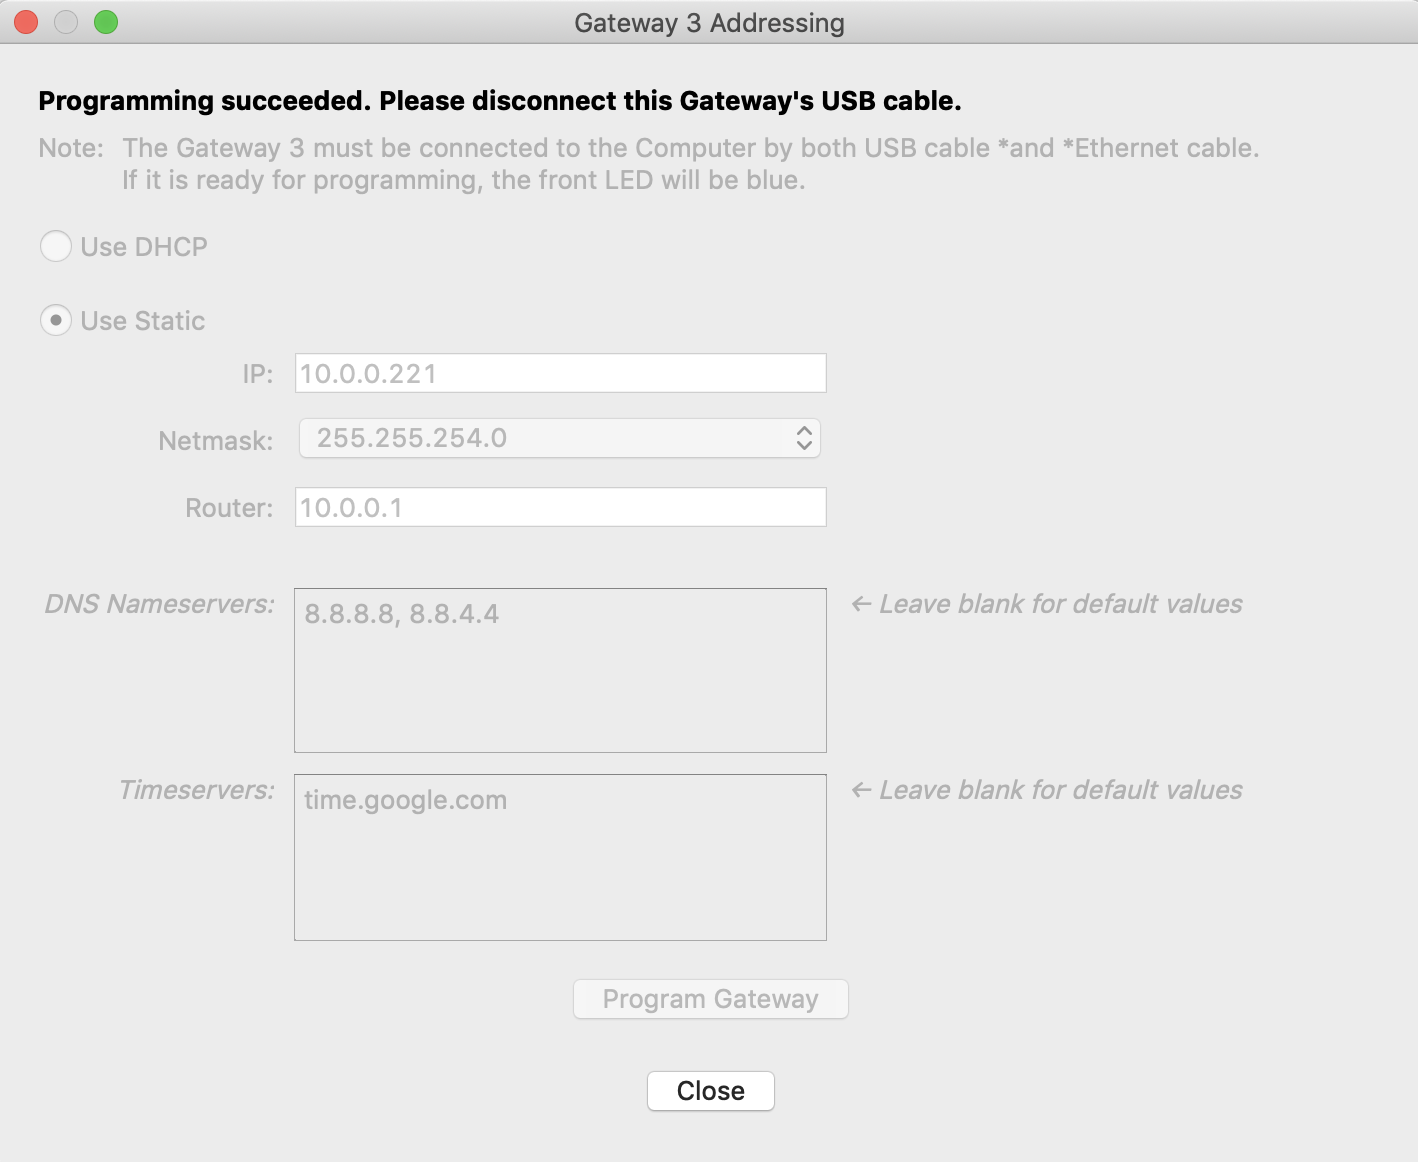
- Unplug the micro USB cable from the DLGW3 and click Close.
- You may also verify that the DLGW3 is statically addressed as the Network LED indicator will now show SOLID BLUE.
Reverting to DHCP settings
- Add all DLGW3’s to mapfile as normal via serial number (or Discovery)
- Connect a micro USB cable to the USB port of the computer running Commissioner. Connect the micro USB cable to the micro USB port of the DLGW3.
- Connect the PoE port of the DLGW3 to a PoE switch or other "live" ethernet connection.
- In Commissioner, click the Map menu and select Set Gateway 3 IP Addresses....
- Once the Gateway 3 Addressing dialog is opened, the tool will auto-discover the connected DLGW.
- Select the option to Use DHCP.
If any custom DNS Nameservers or NTP Timeservers were previously programmed to the gateway, the gateway will continue to use the custom DNS Nameservers or NTP Timeservers after being reverted to DHCP. In order to use the default DNS nameservers and NTP timeservers, delete the values from the fields so that the fields are blank before selecting Program Gateway.
- Click Program Gateway. If programming was successful, you will receive a "Programming succeeded" message.
- Unplug the micro USB cable from the DLGW3 and click Close.
- You may also verify that the DLGW3 is using DHCP as the Network LED indicator will now blink BLUE (if connected to a network with that is serving DHCP addresses).