Update the OS and application of a DLGW3 via USB cable

Only perform this procedure when directed by SiteWorx.

The SiteWorx app (gw3engine files) is constantly updated. If an old version of a SiteWorx app is installed, then the gateway will be downgraded and may lose functionality. SiteWorx automatically updates gateways to the latest SiteWorx app and this procedure is not necessary in almost all scenarios.
Materials Required
- Micro USB cable
- Computer
- DLGW3
- gw3cli
- Email SiteWorxOps@siteworx.io to receive gw3cli. Please note if using a Mac or Windows computer.
- If you are updating the gateway app, SiteWorx Support will provide a link to app 0eb620b.zip
- If If you are updating the gateway OS, SiteWorx Support will provide a link to DLGW3 OS 1.3.4.zip
Workflow
Mac
- Power the gateway for 5 minutes. After 5 minutes, view the large gateway Health indicator:
- If the Health indicator is blinking blue or solid green, STOP and do not perform the steps in this guide.
- If the Health indicator is red, blinking red, off or blinking yellow and you have been advised to perform these steps by SiteWorx, proceed to Step 2.
- Download and unzip gw3cli-macos-1.2.4. Drag the unzipped file into your Desktop.
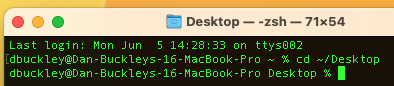
- Open Terminal and change directory to to your Desktop directory where the gw3cli tool is located
- type cd ~/Desktop/
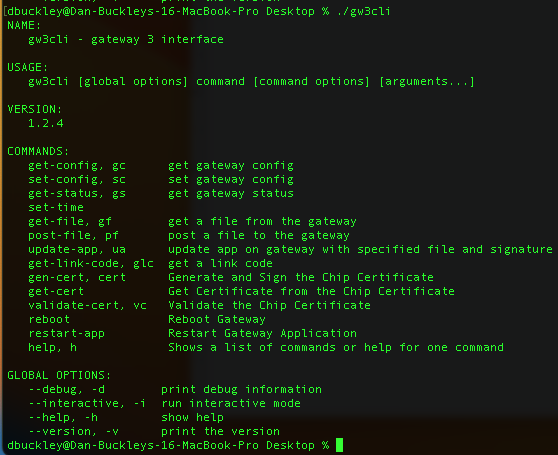
- Enter command ./gw3cli this will show you the help menu with all commands and options.
- If you see the "gw3cli cannot be opened..":
- Click Cancel
- Navigate to System Settings > Privacy & Security, then click Allow Anyway.
- Connect the DLGW3 to your computer via Micro USB cable and wait a few minutes for the DLGW3 to complete booting. The System indicator light will be solid blue when the gateway is ready.
- If SiteWorx Support advised you to update the gateway app, download and unzip app 0eb620b. The folder contains two gw3engine files (one ending in .squashfs-xz and the other ending in .sig). Save the two gw3engine files to your Desktop.
- Update the DLGW3 application to version 0eb620b
- Enter command: ./gw3cli update-app ./gw3engine-0eb620b96c756371a59efbbf8b0cc86d3caa8dbe.squashfs-xz ./gw3engine-d2e1579a1cb95ecf4849c88515d55ee0399437e2.squashfs-xz.dev.sig
- The above command has the correct file paths for a files saved to the Desktop. If you are having difficulty entering the correct the file paths, you can drag and drop gw3cli, gw3engine-0eb620b96c756371a59efbbf8b0cc86d3caa8dbe.squashfs-xz and gw3engine-0eb620b96c756371a59efbbf8b0cc86d3caa8dbe.squashfs-xz.dev.sig into Terminal. This will automatically populate the file paths.
- If SiteWorx Support advised you to update the gateway OS, download and unzip DLGW3 OS 1.3.4.zip. The folder contains two dl-gateway files (one ending in .squashfs-xz and the other ending in .sig). Save the two dl-gateway files to your Desktop.
- Update the DLGW3 OS to version 1.3.4
- Enter command: ./gw3cli update-app ./dl-gateway-basic-gateway3-1.3.4.rootfs.squashfs-xz ./dl-gateway-basic-gateway3-1.3.4.rootfs.squashfs-xz.dev.sig
- Enter command: ./gw3cli get-status
- You should now see osVersion: "1.3.4" and can disregard the other rows.
- Connect the gateway to the internet, wait 5 minutes and observe if the large Health indicator is blue, yellow, green or orange. These colors indicate the SiteWorx app started. A blinking blue Health indicator notes a connection to SiteWorx if the correct ports are open.
Windows
- Download and unzip gw3cli-win32-1.2.4.zip Drag the unzipped file into your Desktop.
- Ensure the latest version of Commissioner is installed to ensure USB drivers are up to date. Visit https://help.siteworx.io/portal/en/kb/articles/download-commissioner for download links.
- Click Start, and search for cmd to open CMD prompt.
- Enter command: cd Desktop
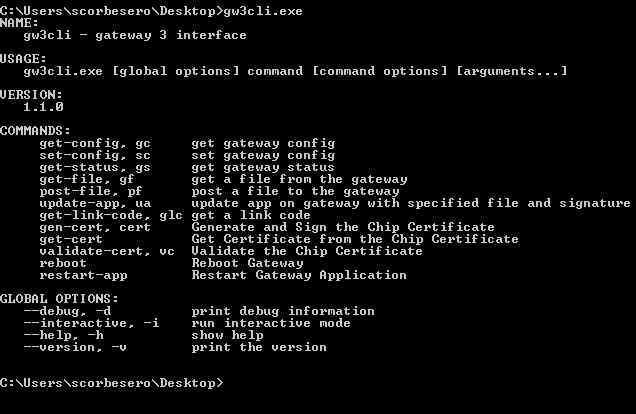
- Enter command: gw3cli.exe
- This will show you the help menu with all commands and options
- Note: The exact syntax of the below commands will depend on where the file is saved and the configuration of your computer. If you are not comfortable with Command Prompt, the easiest thing to do is drag and drop the gw3cli.exe file into Command Prompt to start each command and then manually type the portion of the command after gw3cli.exe For example to do the gw3cli.exe command, drag gw3cli.exe into the Command Prompt and then press the Return/Enter key. To do the gw3cli.exe get-status command, drag gw3cli.exe into the Command Prompt and then type get-status and then press the Return/Enter key.
- Connect the DLGW3 to your computer via Micro USB cable and wait a few minutes for the DLGW3 to complete booting. The System indicator light will be solid blue when the gateway is ready.
- Enter command: ./gw3cli.exe get-status
- If the serialNumber row does not contain an 8-digit serial number, please email SiteWorxOps@siteworx.io with a screenshot of Command Prompt as an additional driver may need to be installed.
- If SiteWorx Support advised you to update the gateway app, download and unzip app 0eb620b. The folder contains two gw3engine files (one ending in .squashfs-xz and the other ending in .sig). Save the two gw3engine files to your Desktop.
- Update the DLGW3 application to version 0eb620b
- Enter command: ./gw3cli update-app ./gw3engine-0eb620b96c756371a59efbbf8b0cc86d3caa8dbe.squashfs-xz ./gw3engine-0eb620b96c756371a59efbbf8b0cc86d3caa8dbe.squashfs-xz.dev.sig
- The exact syntax of the above command will depend on where the file is saved and the configuration of your computer. If you are not comfortable with Command Prompt, the easiest thing to do is drag and drop the gw3cli.exe file into Command Prompt to start each command and then manually type the portion of the command after gw3cli.exe For example to do the update-app command, drag gw3cli.exe into the Command Prompt, then type update-app, press the space bar, drag gw3engine-0eb620b96c756371a59efbbf8b0cc86d3caa8dbe.squashfs-xz into the Command Prompt, drag gw3engine-0eb620b96c756371a59efbbf8b0cc86d3caa8dbe.squashfs-xz.dev.sig into the Command Prompt and then press the Return/Enter key.
- If SiteWorx Support advised you to update the gateway OS, download and unzip DLGW3 OS 1.3.4.zip. The folder contains two dl-gateway files (one ending in .squashfs-xz and the other ending in .sig). Save the two dl-gateway files to your Desktop.
- Update the DLGW3 OS to version 1.3.4
- Enter command: ./gw3cli update-app ./dl-gateway-basic-gateway3-1.3.4.rootfs.squashfs-xz ./dl-gateway-basic-gateway3-1.3.4.rootfs.squashfs-xz.dev.sig
- Enter command: ./gw3cli get-status
- You should now see osVersion: "1.3.4" and can disregard the other rows.
- Connect the gateway to the internet, wait 5 minutes and observe if the large Health indicator is blue, yellow, green or orange. These colors indicate the SiteWorx app started. A blinking blue Health indicator notes a connection to SiteWorx if the correct ports are open.
Related Articles
Commissioning Digital Lumens Fixtures Using a USB Cable
Overview Commissioning via a USB cable requires physically connecting to each fixture. This method of commissioning is most suitable for users who infrequently use Commissioner and would like to program small numbers of fixtures. The most common ...Update Device Firmware
Use this tool to update firmware on a device. SiteWorx subscribers receive automatic firmware updates. Do not perform a firmware update unless directed to do so by SiteWorx Support. Note: To update the firmware, the version must be newer than the ...Resolving USB Wireless Adapter ("Telegesis stick") Errors
The drivers for the DLUSB Wireless Adapter are included with the Commissioner installation package. Commissioner can be downloaded here. To resolve driver related issues, follow the instructions outlined on the Install Commissioner page. Additional ...Convert a DLGW3 from LightRules to SiteWorx
This guide only applies to DLGW3-LR gateways. All DLGW3-LR's have serial numbers beginning in 0202XXXX and have model number "DLGW3-LR" on the front serial number label. DLGW2 units are not compatible. DLGW2 gateways are not compatible with SiteWorx ...Troubleshoot Fixture Tool
Use this tool when specifically requested by SiteWorx Support. Go to Edit > Advanced > Troubleshoot Fixture Select Connect Wirelessly and then choose the network on which the fixture resides OR connect to the fixture directly via USB cable and then ...